Welcome to Yongyi Fasteners, Your Reliable Fastener Supply Partner!

-
ProductsWe supply flat washers, spring washers, drop-in anchors, anchor bolts, hex nuts, hex bolts, sleeve anchors, threaded rods and OEM fastener products to DIN, BS, ANSI and MS standards.

-
About usHEBEI YONGYI FASTENERS MANUFACTURING CO.,LTD is located in China's largest fasteners production base Yongnian fasteners centre.
-
NewsHebei Yongyi Fasteners shares company updates, product knowledge and fastener industry news for global buyers.
-
ServiceThe products sold throughout the domestic and exported to Southeast Asia and Europe and other countries and regions. Our products win good reputation with domestic and foreign customers.



YONGYI FASTENERS
Support stable quality from material selection, processing and inspection to final delivery.
FOCUS ON HOT SPOTS


Get your wheel lug nut size right the first time
Published:
2026-05-19
Author:
YONGYI FASTENERS
Measure your wheel lug nut size accurately with simple tools and clear steps. Ensure a perfect fit for safety and avoid costly mistakes every time.

You can find your wheel lug nut size by taking off one lug nut. Use a caliper or ruler to check how wide it is. Use a thread pitch gauge to see the thread type. Getting the right size is important. Even a small mistake can make driving unsafe or hurt your wheel. The steps are easy if you use the right tools. Follow each step carefully. Many cars use common thread sizes like M12x1.5 mm or 1/2"-20. Lug nuts come in types like cone seat, bulge cone seat, under hub cap, and spline drive. With some help, you can measure your wheel lug nut size. This helps you avoid expensive mistakes.
Tools for Wheel Lug Nut Size

When you want to get your wheel measurement right, you need the right tools. Using the correct tools helps you avoid mistakes and keeps your wheels safe.
Lug Nut Measuring Tools
Caliper or Ruler
A caliper gives you the most accurate reading for the diameter of your lug nut. You can use a digital or manual caliper. Place the jaws around the widest part of the lug nut and read the number. If you do not have a caliper, a sturdy ruler can work for a basic wheel measurement. Make sure you line up the ruler carefully to avoid errors.
Thread Pitch Gauge
A thread pitch gauge helps you find the number of threads per inch or millimeter. You match the teeth of the gauge to the threads on your lug nut. This tool gives you a precise match. Experts in the automotive industry recommend using a thread pitch gauge for best results. Guessing the thread pitch can lead to buying the wrong parts.
Socket Set
A socket set helps you remove the lug nut safely. Choose a socket that fits snugly over the nut. Do not use a socket that is too loose or too tight. This prevents damage to the nut and keeps your tools in good shape. Many professionals use a socket set for every wheel measurement.
Reference Chart
A reference chart lists common lug nut sizes, thread pitches, and seat types. You can compare your measurements to the chart. This step helps you confirm your results. Many industry guides include these charts to help you avoid confusion.
Tip: Always keep your tools clean and organized. Dirty or damaged tools can give you wrong readings.
Why Tools Matter
Using the right tools makes your job easier and safer. Accurate tools help you avoid stripping threads or damaging your wheels. The Society of Automotive Engineers (SAE) and other experts stress the importance of precision in wheel measurement. If you use the wrong tool, you might get a size that does not fit. This can lead to unsafe driving or costly repairs.
You can trust your results when you use the correct tools. You also save time because you do not need to redo your work. Many car owners make mistakes by guessing or using the wrong tool. You can avoid these problems by following expert advice and using the proper equipment.
A good set of tools is an investment in your safety. You protect your wheels, your car, and yourself. Always double-check your measurements before you buy new lug nuts.
Key Measurements to Know
When you measure your wheel lug nut size, you need to focus on three main things: diameter, thread pitch, and seat type. Each measurement helps you find the right fit for your vehicle and keeps your wheels secure.
Lug Nut Diameter
Where to Measure
You measure the diameter across the flat sides of the lug nut, not the points. Use a caliper for the most accurate result. Place the jaws of the caliper on the widest part of the nut. If you use a ruler, line it up carefully to avoid mistakes. Most passenger vehicles use standard sizes, but some trucks and larger vehicles need non-standard sizes.
Diameter Tips
You will find that common hex sizes for lug nuts include:
17 mm
19 mm
21 mm
Some vehicles use less common sizes like 22 mm, 23 mm, 11⁄16 inch (about 17.5 mm), or 13⁄16 inch (about 20.6 mm). Always check your vehicle’s manual or a trusted reference chart. Trucks and larger vehicles, such as some pickups and SUVs, may use a larger diameter. If you drive a heavy-duty vehicle, double-check the diameter before you buy new lug nuts. Accurate measurement prevents damage and keeps your wheels safe. For more details on measurement standards, you can refer to automotive engineering guidelines.
Thread Pitch
Using a Gauge
A thread pitch gauge helps you match the threads on your lug nut to the correct size. Place the gauge against the threads and find the one that fits perfectly. This tool gives you a precise reading. Most cars use standard thread pitches, but some models, especially larger trucks, use unique sizes. For example, some vehicles require an M14x1.5 thread pitch, which is not as common as others.
Alternative Methods
If you do not have a thread pitch gauge, you can use a bolt of known pitch and see if it screws in smoothly. You can also compare your lug nut to a reference chart. Avoid guessing, as even a small error in thread pitch can cause problems. Always confirm your results with a reliable source, such as your vehicle’s manual or a professional mechanic.
Lug Nut Seat Type
Common Types
You need to know the seat type because it affects how the lug nut holds the wheel. The most common seat type in modern vehicles is the 60-degree conical seat. This design spreads the load better, reduces vibration, and improves safety. Other types include flat seats and ball seats, but these are less common today.
How to Identify
Look at the base of your lug nut. A conical seat has a tapered end, while a flat seat looks squared off. Ball seats have a rounded base. Compare your lug nut to pictures in a reference chart or guide. If you see a 60-degree angle at the base, you likely have a conical seat. Always match the seat type to your wheel for a secure fit.
Tip: Some vehicles, like certain trucks and SUVs, use non-standard lug nut sizes and seat types. Always check your specific model before buying replacements.
By understanding diameter, thread pitch, and seat type, you make sure your wheels stay safe and secure. Use the right tools and double-check your measurements for the best results.
How to Measure Wheel Lug Nut Size
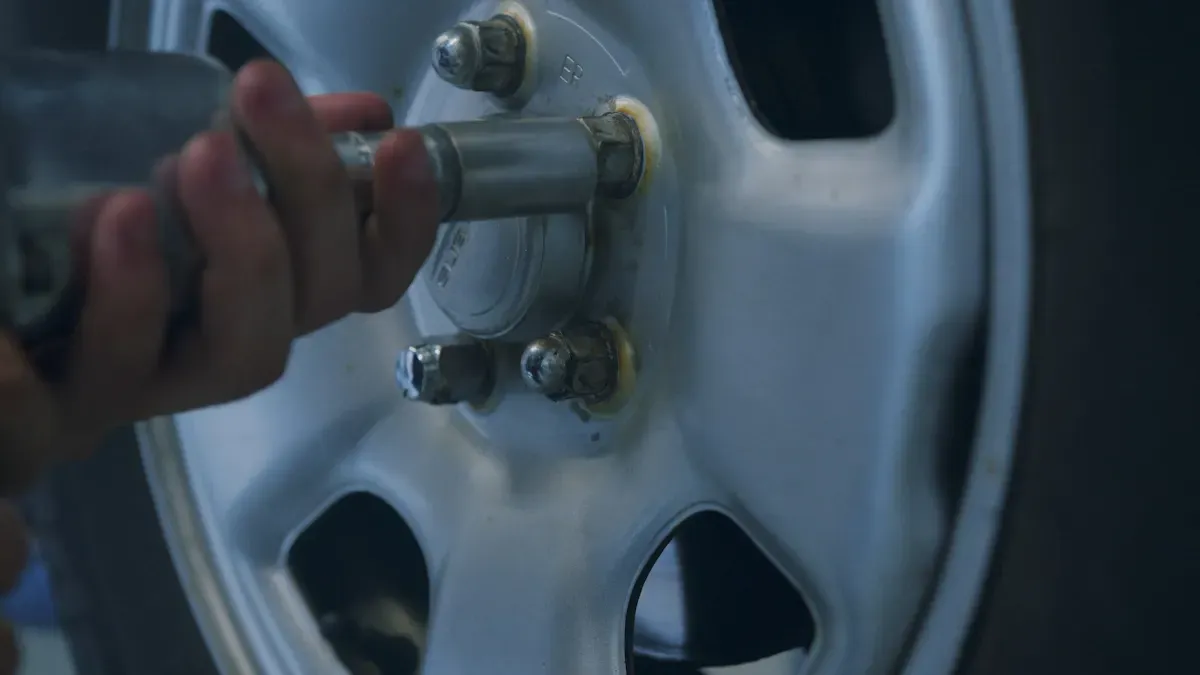
Remove and Measure Lug Nut
Step 1: Remove Lug Nut
Start by parking your vehicle on a flat surface. Use a socket set that matches the hex size of your lug nut. This ensures you do not strip or damage the nut. Always turn the wrench counterclockwise to loosen the lug. If your vehicle uses locking nuts, use a locking wheel nut removal tool. This tool grips the nut securely and prevents scratches or dents. Avoid using a hammer or chisel, as these methods can damage both the nut and the wheel. If you feel unsure, ask a professional for help. Safe removal protects your wheel and makes the next measurement steps easier.
Step 2: Measure Diameter
After removing the lug, clean it with a dry cloth. Dirt or grease can affect your measurement. Use a caliper to measure across the flat sides of the lug. Place the jaws of the caliper on the widest part. Read the number on the caliper display. If you do not have a caliper, use a sturdy ruler, but line it up carefully. Write down the diameter in millimeters or inches. This measurement helps you find the correct fitment for your wheel. Most passenger vehicles use common sizes like 17 mm, 19 mm, or 21 mm. Trucks and larger vehicles may use bigger sizes. Always check your vehicle manual or a reference chart to confirm the proper fitment.
Step 3: Record Size
Write down the diameter and hex size in a notebook or on your phone. Keeping a record helps you avoid confusion during installation. You can also compare your measurement to a reference chart. This step ensures you select the right lug for your vehicle. Accurate records make future installation and fitment checks much easier.
Measure Thread Pitch
Step 1: Use Gauge
Take your thread pitch gauge and match it to the threads on your lug. Slide the gauge teeth along the threads until you find a perfect fit. The correct gauge will sit snugly in the grooves without gaps. This method gives you a precise measurement of the thread pitch. Most vehicles use standard pitches, but always confirm with your gauge. If you do not have a gauge, you can use a bolt with a known pitch and see if it screws in smoothly. Avoid guessing, as even a small error can cause installation problems.
Step 2: Confirm Fit
Double-check your measurement by comparing it to your vehicle’s manual or a trusted chart. Make sure the thread pitch matches exactly. A mismatch can lead to poor fitment or even damage during installation. If you feel unsure, ask a professional to confirm your results. Accurate thread pitch measurement ensures safe and secure installation every time.
Identify Seat Type
Step 1: Inspect Base
Look closely at the base of your lug. The seat type affects how the lug holds the wheel. Most modern vehicles use a 60-degree conical seat. Some use ball seats or flat seats. The shape at the base tells you the type. A conical seat has a tapered end, a ball seat looks rounded, and a flat seat appears squared off. Clean the base before you inspect it. Dirt can hide the true shape and lead to mistakes in fitment.
Step 2: Compare Types
Use a reference chart or guide to compare your lug to common seat types. Place your lug next to pictures or diagrams. This helps you confirm the seat type for proper fitment. If you see a 60-degree angle, you likely have a conical seat. Always match the seat type to your wheel for safe installation. If you feel unsure, ask a professional or check your vehicle’s documentation.
Tip: Always measure each aspect—diameter, thread pitch, and seat type—before you buy new lugs. This ensures proper fitment and safe installation.
Step-by-Step Table for Lug Nut Measurement and Fitment
You can follow these steps to measure your lug nut size with confidence. Accurate measurement and proper fitment protect your wheels and make installation smooth. Always use the right method and tools for each step. This approach follows industry guidelines and best practices for wheel installation.
Measurement Tips
Clean Parts
Always clean each lug nut and wheel stud before measuring. Dirt, grease, or rust can hide the real size. Use a dry cloth or soft brush to wipe away dirt. If you see lots of rust, use a wire brush gently. Clean parts help you get accurate readings with your caliper or thread pitch gauge.
Tip: Clean tools and parts before you measure. This follows advice from automotive engineering guides. Clean surfaces stop mistakes and keep your tools safe.
When parts are clean, you can spot damage or wear more easily. If you see stripped threads or cracks, replace the lug nut before measuring. Clean parts also make it easier to compare your lug nut to charts or diagrams.
Double-Check
Always double-check your measurements. Measure the diameter two times, using both a caliper and a ruler if you can. Confirm the thread pitch with a gauge and check it against a chart. Look at the seat type and match it to pictures or diagrams.
Write down each measurement in a notebook or on your phone.
Compare your results to your vehicle manual or a trusted chart.
Ask a professional if you feel unsure.
Note: Double-checking stops expensive mistakes. The National Highway Traffic Safety Administration (NHTSA) says to check wheel hardware sizes for safety.
You can avoid buying the wrong lug nuts by double-checking. This step saves time and money. You also protect your wheels and keep your vehicle safe.
You feel more confident in your results when you double-check. You also follow best practices used by professionals in the automotive industry.
Reminder: Clean parts and double-check measurements every time. These habits help you get your wheel lug nut size right the first time.
Avoiding Common Mistakes
Wrong Part Measured
You might think all wheel hardware looks the same. Many people measure the wrong part by mistake. For example, you may measure the outside of the lug nut instead of the flat sides. This gives you the wrong diameter. You may also measure the bolt instead of the nut. Always check that you measure the correct part. Use a caliper or ruler on the flat sides of the lug nut. Write down your results right away. This habit helps you avoid confusion later.
Tip: Double-check which part you are measuring before you start. This simple step saves time and prevents errors.
Incorrect Tools
Using the wrong tool can lead to big problems. A loose socket can round off the nut. An impact wrench can over-tighten and stretch the wheel studs. You should use a hand socket and a torque wrench for best results. Calibrate your torque wrench often. If you do not, you may apply the wrong amount of force. This can damage your wheels or make them unsafe.
Here is a table that shows how tool mistakes can affect your results:
You protect your wheels when you use the right tools. You also make sure your measurements are correct. Always clean your tools before use. Check that your sockets fit snugly. Never guess which tool to use.
Thread Pitch Errors
Thread pitch mistakes are common. You may pick a lug nut that looks right but has the wrong threads. This can strip the stud or make the nut impossible to install. Always use a thread pitch gauge. Match the gauge teeth to the threads on your lug nut. If you do not have a gauge, compare your lug nut to a known good one. Never force a nut onto a stud. If it does not turn easily by hand, stop and check the pitch.
Note: Even a small thread pitch error can cause damage. Take your time and check your work.
You keep your wheels safe when you avoid these mistakes. Careful measuring and the right tools help you get the job done right the first time.
Overlooking Seat Type
Many people focus only on diameter and thread pitch. You might forget to check the seat type, but this detail matters just as much. The seat type is the shape at the base of your lug nut. It decides how the nut contacts your wheel. If you use the wrong seat type, you risk damaging your wheel or causing the lug nut to loosen while driving.
You will find three main seat types:
Conical (60-degree taper): Most common in modern vehicles. The base looks like a cone.
Ball (radius): The base is rounded, like a ball.
Flat: The base is flat and sits flush against the wheel.
Tip: Always match the seat type of your new lug nuts to your wheels. Even a small mismatch can lead to unsafe driving.
If you overlook the seat type, you might see these problems:
Uneven pressure on the wheel
Damaged wheel holes
Lug nuts that loosen over time
You can identify the seat type by looking at the base of your old lug nut and comparing it to a reference chart. Clean the nut before you check. Dirt can hide the true shape. If you feel unsure, ask a professional or check your vehicle manual.
You protect your wheels and your safety when you pay attention to seat type. Never skip this step.
Guesswork vs. Measurement
Guessing your lug nut size might seem quick, but it leads to mistakes. You might pick a nut that looks right, but small differences matter. Even a 1 mm error can cause poor fitment or damage. Always measure each part—diameter, thread pitch, and seat type.
Here is why measurement beats guesswork every time:
Accuracy: You get the exact size you need.
Safety: Proper fitment keeps your wheels secure.
Cost savings: You avoid buying the wrong parts.
Note: The National Highway Traffic Safety Administration recommends measuring wheel hardware for safety. Guessing does not meet industry standards.
You can use simple tools like a caliper, thread pitch gauge, and a reference chart. Write down your results. Double-check each measurement before you buy new lug nuts.
If you feel unsure, ask a professional to confirm your measurements. Never force a lug nut onto a stud. If it does not fit easily, stop and re-measure.
Quick Checklist for Success:
Remove and clean the lug nut
Measure diameter with a caliper or ruler
Check thread pitch with a gauge
Identify seat type visually
Record all measurements
Compare with a reference chart
You get the right fit the first time when you measure, not guess. This habit protects your wheels and keeps you safe on the road.
Confirm and Compare Measurements
Check with Manual
You should always check your measurements against your vehicle’s owner’s manual. The manual gives you the exact specifications for your wheel lug nuts. This includes the correct size, thread pitch, and torque value. When you match your measurements to the manual, you confirm that you have the right parts for your car. Manuals also list the recommended torque for tightening lug nuts. Using the correct torque keeps your wheels secure and prevents damage.
Here is a table showing typical torque specifications for different vehicles:
You can find this information in your manual or on a sticker inside the driver’s door. Always use these numbers when installing new lug nuts. This step helps you avoid over-tightening or under-tightening, which can cause wheel problems.
Tip: If your measurements do not match the manual, double-check your tools and try again.
Compare to Old Lug Nuts
Comparing your new measurements to your old lug nuts gives you another way to confirm accuracy. Place the old and new lug nuts side by side. Check the diameter, thread pitch, and seat type. They should look and feel the same. If you see any difference, measure again. Sometimes, old lug nuts show wear or damage. If you notice stripped threads or a worn seat, do not reuse them. Always use new, undamaged lug nuts for best safety.
Hold both lug nuts in your hand.
Look at the base shape and thread pattern.
Feel for any difference in weight or size.
This quick check helps you catch mistakes before you install the new parts.
Note: If you have lost or replaced all your old lug nuts, rely on your manual and measurement tools.
Ask a Pro
If you feel unsure about your measurements, ask a professional mechanic for help. Mechanics use precise tools and have experience with many vehicle types. They can check your measurements and confirm that your lug nuts fit your wheels. You get peace of mind knowing your wheels are safe.
Here are some reasons to consult a professional:
Mechanics ensure accurate measurements of wheel lug nut sizes.
They verify compatibility, which is essential for safe vehicle operation.
Experts help when you modify wheels to keep safety and performance.
You can visit a local shop or ask a trusted mechanic. Bring your measurements and any old lug nuts. A professional can spot problems you might miss. This step adds an extra layer of safety to your process.
Reminder: Never guess if you feel unsure. A quick check with a pro can save you time and money.
Test Fit Before Buying
You should always test fit your lug nuts before making a purchase. This step helps you avoid costly mistakes and keeps your wheels safe. You can check the fit by using a sample lug nut or by visiting a local auto parts store. Many stores allow you to try a lug nut on your wheel stud before you buy. This practice gives you confidence that the lug nut matches your measurements.
Start by bringing your old lug nut and your recorded measurements. Show them to the store staff. Ask for a sample lug nut that matches your diameter, thread pitch, and seat type. Try screwing the sample onto your wheel stud by hand. The lug nut should turn smoothly without resistance. If you feel any tightness or looseness, stop and check your measurements again.
Tip: Always test fit the lug nut by hand. Avoid using tools for this step. Hand fitting prevents thread damage and shows if the nut matches the stud.
You can use a checklist to make sure you test fit correctly:
Clean the wheel stud and lug nut.
Check the diameter and thread pitch.
Inspect the seat type.
Screw the sample lug nut onto the stud.
Confirm a snug, smooth fit.
If you notice any issues, such as wobbling or difficulty turning, you may have the wrong size or thread pitch. Testing the fit helps you catch these problems early. You protect your wheels and avoid buying the wrong parts.
Here is a table to help you remember what to check during a test fit:
You can ask the store staff for advice if you feel unsure. Many professionals have experience with different vehicles and can help you find the right lug nut. You build trust by following expert recommendations and checking your fit before buying.
Note: The National Highway Traffic Safety Administration recommends checking wheel hardware fitment for safety. Testing the fit before buying follows industry best practices.
You save time and money by testing the fit. You also keep your wheels secure and your vehicle safe. Always test fit your lug nuts before making a final purchase.
Measure Your Tire Bolt Pattern
What is Wheel Bolt Pattern
You need to know your wheel bolt pattern before you buy new wheels or lug nuts. The bolt pattern describes how the bolts or studs are arranged on your wheel hub. You see this pattern written as two numbers, such as 5x114. The first number shows the number of lugs. The second number shows the distance between the bolts, measured in millimeters or inches. For example, a 5x114 pattern means your wheel has five bolts spaced 114 millimeters apart. If you want a safe and proper fit, you must match the bolt pattern exactly.
A correct wheel bolt pattern ensures your wheel sits flush against the hub. If you use the wrong pattern, you may notice rubbing, vibration, or poor mounting. Even if the wheel seems to fit, an incorrect pattern can cause problems over time. Always check your bolt pattern before you select new hardware.
The bolt pattern and lug seat type both affect how your wheel mounts and performs. A mismatch can lead to unsafe driving conditions.
Many vehicles, like some sedans, use a 5x114 pattern.
Older models may use patterns like 4x100 or 4x120.
Always count your tire bolts and measure the spacing to confirm your pattern.
How to Measure Wheel Bolt Pattern
Tools Needed
You need a few simple tools to measure your tire bolt pattern:
A bolt pattern gauge
A ruler or tape measure
A notepad for recording results
A bolt pattern gauge helps you find the exact spacing between the bolts. You can also use a ruler if you do not have a gauge, but a gauge gives you more accuracy.
Step-by-Step Guide
Follow these steps to measure your tire bolt pattern:
Park your vehicle on a flat surface and make sure the wheel is clean.
Count your tire bolts. This tells you the number of lugs.
Place the bolt pattern gauge over the wheel studs. For 4-lug and 6-lug wheels, measure from the center of one stud to the center of the stud directly across. For measuring for 5-lug wheels, measure from the center of one stud to the outer edge of the farthest stud.
Read the measurement on your bolt pattern gauge. Write down the result.
Double-check your measurement by repeating the process.
Tip: Always use a bolt pattern gauge for the most accurate results. If you use a ruler, measure carefully and avoid parallax errors.
Why Bolt Pattern Matters
You must measure your tire bolt pattern correctly for safety and performance. An incorrect pattern prevents the wheel from seating flush against the hub. This can cause vibration and may loosen the lug hardware. In severe cases, the wheel could separate from the vehicle. Uneven clamping force can also damage your wheel over time.
A correct bolt pattern keeps your wheel secure.
You avoid vibration and uneven wear.
You protect your vehicle from costly damage.
Note: Always match your wheel bolt pattern and lug nut size for the best fit and safest ride.
By using a bolt pattern gauge and following these steps, you ensure your wheels fit perfectly every time. You keep your vehicle safe and your ride smooth.
You can measure your wheel lug nut size accurately by following these steps:
Measure the bolt diameter across the shank.
Measure the bolt length from the underside of the head to the tip.
Measure the thread pitch using a thread pitch gauge.
You need the right tools and careful attention to detail. Double-check your measurements before buying or replacing lug nuts. When you follow a detailed guide, you increase your chances of getting the correct size the first time. You can feel confident that your wheels will stay safe and secure.
FAQ
What if I do not have a caliper?
You can use a sturdy ruler for basic measurements. Line it up carefully across the flat sides of the lug nut. For best accuracy, ask a local auto parts store to measure for you.
How do I know if my lug nut is metric or standard?
Check your vehicle manual for specifications. Metric sizes use millimeters (mm), while standard sizes use inches. You can also compare your measurement to a reference chart for confirmation.
Can I reuse old lug nuts?
You should inspect old lug nuts for wear, rust, or stripped threads. Replace any damaged ones. Using worn lug nuts can cause unsafe wheel attachment and possible wheel loss.
Why does seat type matter for lug nuts?
Seat type controls how the lug nut contacts the wheel. Using the wrong seat type can damage your wheel or cause the nut to loosen. Always match the seat type to your wheel for safety.
What happens if I use the wrong thread pitch?
The wrong thread pitch can strip the stud or make the nut impossible to install. You should always measure and confirm the pitch before buying new lug nuts.
How tight should I make my lug nuts?
You should use a torque wrench and follow the torque value in your vehicle manual. Overtightening or undertightening can damage your wheels or cause them to come loose.
Can I mix different lug nut types on one wheel?
You should never mix lug nut types on the same wheel. This can cause uneven pressure, wheel damage, or unsafe driving. Always use the same type and size for each wheel.
How often should I check my lug nuts?
Check your lug nuts every time you rotate your tires or after wheel service. Regular checks help you spot loose or damaged nuts early and keep your wheels secure.
Get Quote
Welcome To Know Our Products
Get Product and Service Information
Follow us
We provide OEM service and focus on stable quality, competitive pricing and responsive export support.


Contact Info
Add:Dongmingyang Industrial Park, Mingguan Town, Yongnian District, Handan City, Hebei Province China
Export salesman:
WhatsApp:+86 18830064300
E-mail: sales@hgtfix.com
Export salesman:
WhatsApp
+86 18830064300
E-mail:
Copyright © 2022 HEBEI YONGYI FASTENERS MANUFACTURING CO.,LTD Power by 300.cn | SEO